How to fix a zipper that came off? Zipper malfunctions can throw a wrench in our daily routine, especially when that pesky zipper decides to come off its track. Fear not! In this comprehensive guide, we’ll delve into the art of zipper resurrection, exploring various techniques, reasons behind these mishaps, and preventive measures. Let’s embark on a zipper-fixing journey that ensures your favorite jacket or bag remains securely fastened.
Table of Contents
Steps How to Fix a Zipper That Came Off Track
Embarking on the quest to rescue your jacket’s zipper? Here’s a step-by-step guide to guide you through the process:
- Assess the Situation: Before diving in, take a moment to assess the zipper’s condition. Identify any visible obstructions or misalignments.
- Gentle Realignment: Gently guide the zipper slider back onto the track. Use your fingers to ensure a smooth, even path for the slider.
- Lubrication Magic: Apply a small amount of lubricant to the zipper teeth. This can be a pencil, a bar of soap, or even a specialized zipper lubricant. This step eases the movement and prevents future snags.
- Test the Zipper: Once realigned and lubricated, give your zipper a test run. Glide it up and down to ensure it moves seamlessly without any hiccups.
- Reinforce with a Safety Pin: For added security, you can use a small safety pin through the fabric near the zipper’s base. This prevents the slider from taking an unauthorized detour.
By following these steps, you’ll revive your jacket’s zipper and flaunt your fashion prowess!
Common Reasons Why Zippers Come Off and How to Prevent It
Understanding the root causes of zipper mishaps is crucial for preventing future wardrobe malfunctions. Let’s unravel the mysteries:
- Excessive Force: Pulling the zipper with excessive force is a common culprit. Remind yourself to be gentle, allowing the zipper to glide smoothly.
- Misalignment of Teeth: Zipper teeth misalignment can lead to derailment. Ensure the teeth are aligned before zipping up.
- Worn-out Slider: Over time, the slider can wear out. Regularly lubricate the zipper to enhance its longevity.
- Fabric Obstructions: Loose threads or fabric getting caught in the zipper can cause disruptions. Keep an eye on loose threads and trim them promptly.
- Poor Quality Zippers: Cheap or poorly constructed zippers are prone to malfunction. Invest in quality zippers for long-lasting reliability.
Preventive measures go a long way in maintaining zipper sanity. A stitch in time – or, in this case, proper zipper care – saves nine!
DIY Zipper Repair Techniques for Beginners
Embarking on your DIY zipper rescue mission? Here are beginner-friendly techniques to tackle zipper mishaps like a pro:
- Paperclip Magic: In a pinch? A paperclip can act as a makeshift zipper pull. Thread it through the slider hole, and voilà – instant zipper pull!
- Candle Wax Wonder: Rubbing a candle on the zipper teeth provides a quick lubrication fix. The wax reduces friction, allowing the slider to move effortlessly.
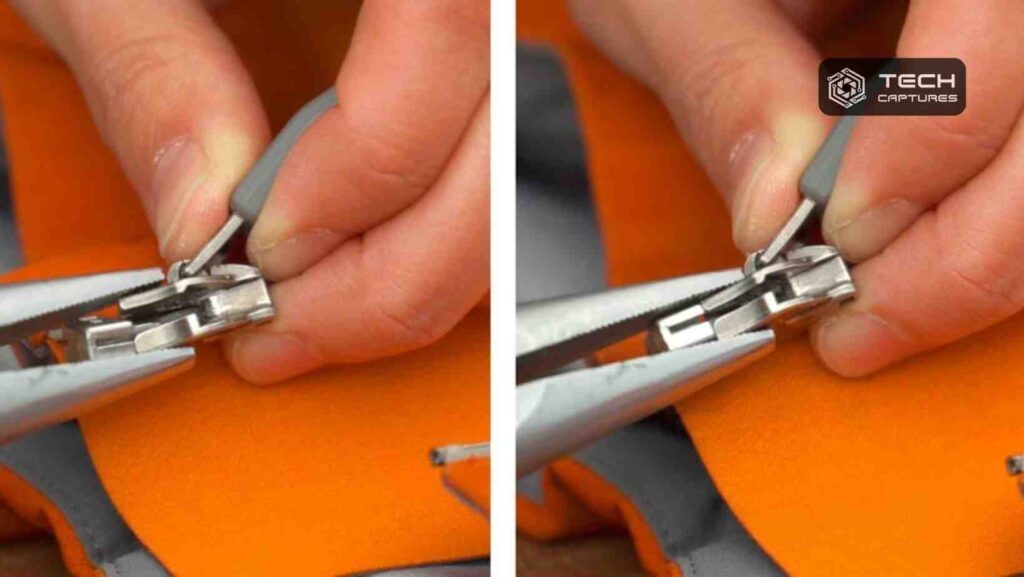
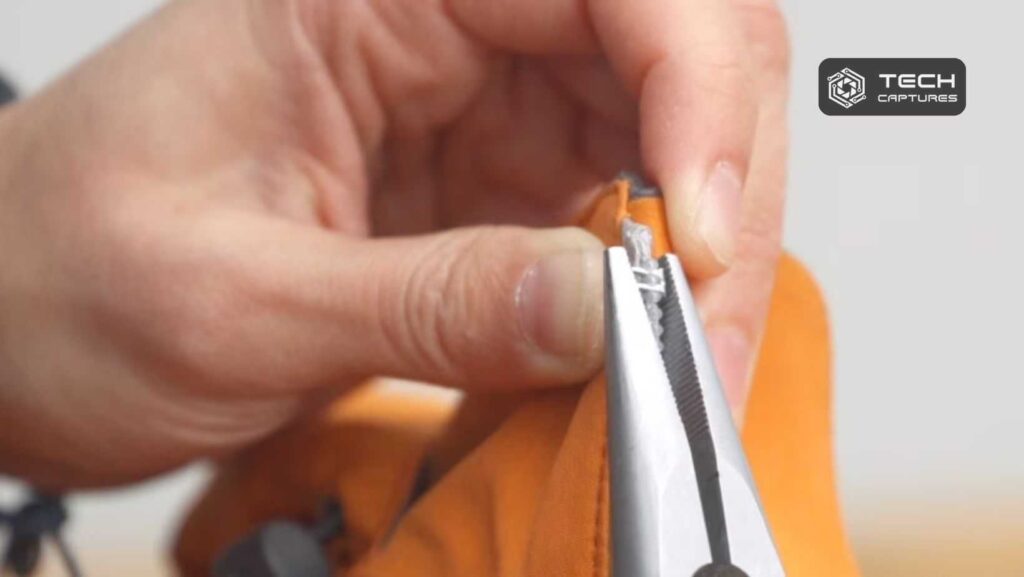
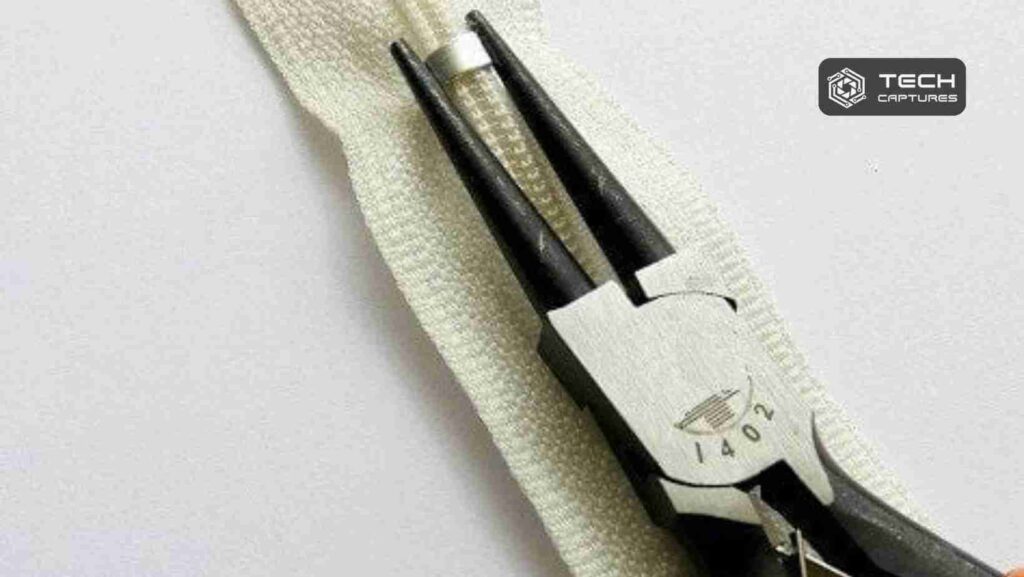
- Pliers Power: For stubborn zippers, gently use pliers to grip and guide the slider back onto the track. Exercise caution to avoid damaging the fabric.
- Zipper Pull Replacement: If the pull is the issue, replace it with a paperclip, keyring, or even a decorative charm. Get creative with your zipper pull accessories!
- Fabric Tape Assistance: For minor fabric obstructions, transparent fabric tape can provide a temporary solution. It keeps the fabric in check without compromising the zipper’s functionality.
Can I Use Household Items to Fix a Zipper That Came Off?

Absolutely! Raid your household for ingenious solutions to zipper woes:
- Graphite Pencil Graphite Pencil: The humble graphite pencil isn’t just for sketches. Rub its point along the zipper teeth to provide a dry lubrication fix.
- Soap Bar Savior: A bar of soap works wonders as a zipper lubricant. Rub the soap gently along the teeth, ensuring smooth gliding.
- Safety Pin Quick Fix: A strategically placed safety pin can act as a temporary solution to keep the zipper in place until a more thorough repair can be undertaken.
Household items, often overlooked, can be your allies in the battle against zipper troubles.
Tips for Repairing a Stuck Zipper Without Damaging the Fabric
Encountering a stuck zipper can be frustrating, but fear not – here are tips to navigate this challenge without causing harm to your beloved fabric:
- Gentle Tug Technique: Instead of yanking the zipper aggressively, apply gentle and even tugs on both sides of the fabric. This can help release any fabric caught in the teeth.
- Warm Water Soak: Submerge the fabric around the stuck zipper in warm Water for a few minutes. The warmth can help relax the fibers, making it easier to unstick the zipper.
- Vinegar Magic: Mix equal parts water and vinegar, then dab a cotton swab into the solution. Gently rub it along the zipper track. Vinegar’s acidic properties can assist in loosening the grip.
- Pencil Eraser Precision: The eraser end of a pencil isn’t just for erasing. Rub it along the zipper teeth to provide a gentle nudge, helping to unstick the zipper.
- Hairdryer Heat: Apply a hairdryer on low heat to warm the stuck zipper. This can be particularly effective if the fabric is resistant to the warm water soak.
Mastering these gentle techniques ensures your zipper gets back on track without leaving a mark on your favorite garment.
Professional Zipper Repair vs. Do-It-Yourself Methods
When it comes to zipper troubles, the age-old debate arises – should you seek professional help or trust your DIY skills? Let’s explore the pros and cons:
- DIY Affordability: DIY methods are often cost-effective, using household items and simple techniques. They’re ideal for minor issues that can be tackled at home.
- Professional Expertise: For complex zipper problems or high-value items, seeking professional assistance may be the wisest choice. Professionals have the expertise to handle intricate repairs.
- Time Considerations: DIY methods provide quick fixes for immediate issues. Professional repairs may take more time, but they often result in a more thorough and long-lasting solution.
- Risk of Damage: DIY repairs carry a minimal risk of accidental damage. Entrusting your zipper to a professional minimizes this risk, ensuring a careful and precise approach.
In the battle of DIY prowess versus professional finesse, consider the nature of the zipper malfunction and your comfort level in undertaking repairs.
Is It Possible to Fix a Zipper Without Sewing Skills?
Are sewing skills outside your repertoire? Fret not – you can still rescue your zipper without a needle and thread:
- Fabric Glue Savior: Fabric glue can work wonders for reattaching fabric near the zipper without sewing. Apply a small amount and press the fabric together for a secure bond.
- Iron-on Patches: Iron-on patches offer a no-sew solution for fabric near the zipper. These patches adhere to the fabric with the application of heat, providing a seamless fix.
- Snap Fasteners Magic: Snap fasteners, also known as press studs, can be applied without sewing. Attach them strategically to secure the fabric around the zipper area.
- Safety Pin Security: A well-placed safety pin can serve as a temporary fix for fabric misalignments, keeping the zipper in place until a more permanent solution is sought.
Need to improve sewing skills? No problem! These no-sew techniques ensure your zipper gets the attention it needs.
Video Tutorials on Fixing Zippers for Visual Learners

For those who prefer a visual guide, we’ve curated a collection of video tutorials to demystify the art of fixing zippers. Let’s dive into the world of visual learning:
- YouTube Demystified: Head to YouTube, the treasure trove of tutorials. Search for reputable channels that specialize in zipper repair. Visual demonstrations can enhance your understanding of each technique.
- Step-by-Step Guidance: Look for tutorials that provide step-by-step guidance. A clear and concise breakdown of each repair method ensures you can follow along seamlessly.
- Close-Up Shots: Opt for videos with close-up shots of the zipper repair process. This allows you to observe the intricate details, making it easier to replicate the techniques on your own.
- Troubleshooting Tips: Choose tutorials that include troubleshooting tips. Understanding common pitfalls and how to navigate them ensures a smoother repair process.
- DIY Enthusiast Channels: Seek out channels run by fellow DIY enthusiasts. Their passion often translates into engaging and informative tutorials that cater specifically to visual learners.
By immersing yourself in these video tutorials, you’ll gain a practical understanding of zipper repair techniques, making you a zipper maestro in no time!
Zipper Maintenance Tips to Avoid Future Issues
Prevention is the best cure – let’s explore zipper maintenance tips to keep potential issues at bay:
- Regular Lubrication: Make lubricating your zippers a routine. A dry zipper is more prone to snags and malfunctions. Use graphite pencils, soap, or specialized zipper lubricants for optimal results.
- Inspect and Trim Threads: Regularly inspect your garments for loose threads near zippers. Trim them promptly to prevent entanglement and zipper derailment.
- Gentle Handling: Handle zippers with care. Avoid unnecessary force or aggressive pulling, as this can lead to misalignments and damage.
- Quality Zippers Matter: Invest in quality zippers for your garments and accessories. Well-constructed zippers are less likely to malfunction, providing long-term reliability.
- Store Items Properly: When not in use, store items with zippers in a way that minimizes stress on the zipper. Avoid overstuffing bags, which can strain the zipper and lead to issues.
By incorporating these maintenance tips into your routine, you’ll not only extend the life of your zippers but also reduce the likelihood of encountering zipper-related woes.
How to Repair a Zipper on a Backpack or Bag
Backpacks and bags endure a fair share of wear and tear. Here’s your guide to addressing zipper issues specifically on these items:
- Empty the Bag: Before attempting any repair, empty the bag to access the zipper without obstruction. This ensures a thorough examination and repair process.
- Follow General Repair Steps: Apply the general steps mentioned earlier for jackets when fixing a backpack or bag zipper. Assess, realign, lubricate, and test for smooth operation.
- Consider Bag Material: Take into account the material of the bag. Delicate fabrics may require extra care to avoid damage during the repair process.
- Reinforce with Fabric Tape: If the fabric around the zipper is fraying, transparent fabric tape can provide a temporary fix. It reinforces the area without compromising the bag’s aesthetic.
- Evaluate Zipper Strength: Consider the contents of your bag. If it frequently carries heavy items, opting for a more robust zipper or reinforcing the existing one may be necessary.
With these tailored tips, you’ll confidently tackle zipper issues on your favorite backpacks and bags, ensuring they’re always ready for your adventures.
What to Do If the Zipper Pulls Breaks During Repair?
Facing a broken zipper pull mid-repair? Don’t panic – here’s a strategic plan to overcome this unexpected hurdle:
- Locate a Replacement Pull: Check if you have a spare zipper pull in your sewing kit or any unused bags. If not, consider repurposing a small keyring, paperclip, or even a decorative charm as a makeshift replacement.
- Thread and Knot Method: If a replacement pull isn’t available, employ the thread and knot method. Thread a sturdy piece of thread or thin cord through the slider hole, creating a loop. Tie a secure knot, providing a makeshift pull.
- Pliers Precision: If you have pliers on hand, use them carefully to grip and pull the slider. Exercise caution to avoid damaging the fabric or exacerbating the situation.
- Bobby Pin Innovation: Unwind a bobby pin and insert it through the slider hole. The looped end can act as a temporary pull, allowing you to continue the repair process.
- DIY Paracord Pull: Paracord is not only durable but can also serve as a makeshift zipper pull. Cut a small length, thread it through the slider hole, and tie secure knots.
Adaptability is key when facing a broken zipper pull. With these creative solutions, your repair mission can soldier on, ensuring success despite the unexpected twist.
Quick Fixes for Zippers on Jeans That Won’t Stay Zipped
Are jeans refusing to cooperate with your zipping efforts? Let’s explore quick fixes to ensure they stay securely zipped:
- Rubber Band Magic: Loop a small rubber band through the zipper pull and around the jeans button. This simple hack provides extra tension, preventing the zipper from sliding down.
- Keyring Reinforcement: Thread a keyring through the zipper and pull and hook it onto the button. This makeshift extension adds stability, keeping your jeans securely fastened.
- Hair Tie Trick: Similar to the rubber band method, a hair tie can be looped through the zipper pull and secured around the button. It offers a snug fit without compromising comfort.
- Sew a Button Loop: For a more permanent solution, sew a small fabric loop near the zipper area. This loop can be hooked onto the button, ensuring a secure closure every time.
- Safety Pin Security: A well-placed safety pin through the fabric near the zipper area can act as a quick fix. Exercise caution to avoid snagging the fabric.
How to fix a zipper that came off? With these quick fixes, your jeans will stay zipped, allowing you to strut your stuff confidently without the worry of an unexpected wardrobe malfunction.
Are There Temporary Solutions for a Zipper Until It Can Be Properly Repaired?
In a rush and need a temporary fix for your zipper? Explore these quick solutions until you can dedicate time for a thorough repair:
- Paperclip Pull: Use a paperclip as a makeshift zipper pull. Thread it through the slider hole, providing a temporary solution for easy zipping.
- Binder Clip Stability: A small binder clip can secure the zipper in place temporarily. Clip it onto the fabric near the zipper to prevent any unwarranted sliding.
- Safety Pin Security (Again!): The trusty safety pin makes another appearance. Use it strategically to hold the zipper in place until a more permanent repair can be undertaken.
- Hair Tie Hold: A spare hair tie can be looped around the zipper pull and secured to the button or fabric. It’s a quick and effective way to maintain zipper integrity.
Temporary solutions come in handy for those moments when time is of the essence. Implement these tricks to keep your zipper functional until a more thorough repair can be executed.
Common Mistakes to Avoid When Fixing a Zipper
Navigating the intricacies of zipper repair requires finesse. Steer clear of these common mistakes to ensure a smooth and successful fixing process:
- Forceful Tugging: Avoid aggressive pulling or yanking, as this can exacerbate the issue or damage the zipper further. Opt for gentle and even movements.
- Ignoring Fabric Threads: Neglecting loose threads near the zipper is a recipe for trouble. Trim them promptly to prevent entanglement and ensure smooth zipping.
- Using Excessive Lubricant: While lubrication is key, using excessive amounts of graphite, soap, or specialized lubricants can lead to a messy situation. A little goes a long way.
- Overlooking Misaligned Teeth: Ensure the zipper teeth are properly aligned before attempting any repairs. Ignoring misalignments can result in recurring issues.
- Neglecting Professional Assistance: For complex or valuable items, seek professional help. Attempting intricate repairs without expertise may lead to unintended consequences.
By sidestepping these common pitfalls, you’ll elevate how to fix a zipper that came off the game and confidently tackle any zipper-related challenges that come your way.

